This screen enables Sell Currencies, Taxes, Revenue Account, Credit Limit, Payment Terms and Bank Account details to be set up for the agent.
Attaching a Currency to the Debtor
Default Currency
The currency that is defined in the default currency field has defaulted from when the Agent was initially inserted. If the default currency needs to change, choose the new default currency here and save the changes.
Additional currencies can also be inserted to make them available for an agents bookings to be costed and invoiced in.
Insert a New Currency
- Make sure the currency to add is available (see the System Setup User Manual).
-
On the
 Debtors screen (Currencies tab), click Insert.

-
On the emptyCurrency screen, choose a Currency from the drop-down list available and add Payment Terms (mandatory). Add information in the optional fields on this screen if known.
NOTE: Only currencies that do not already appear in the list under the Currencies tab are available in the drop-down Currency field. If all available currencies have already been chosen for this agent, then none will appear in the drop-down list.
-
ClickOK to keep the changes and save or update the entry.

-
ClickExit to discard any changes.

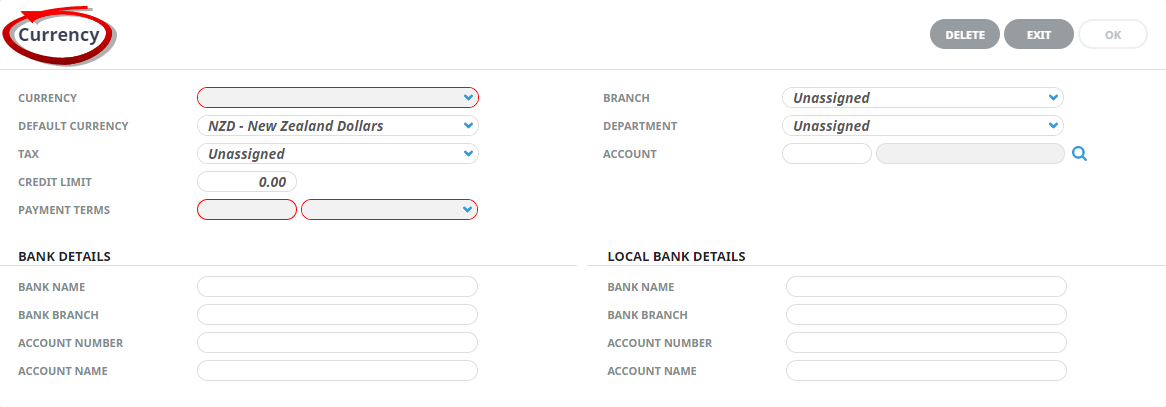
About the Currency Fields
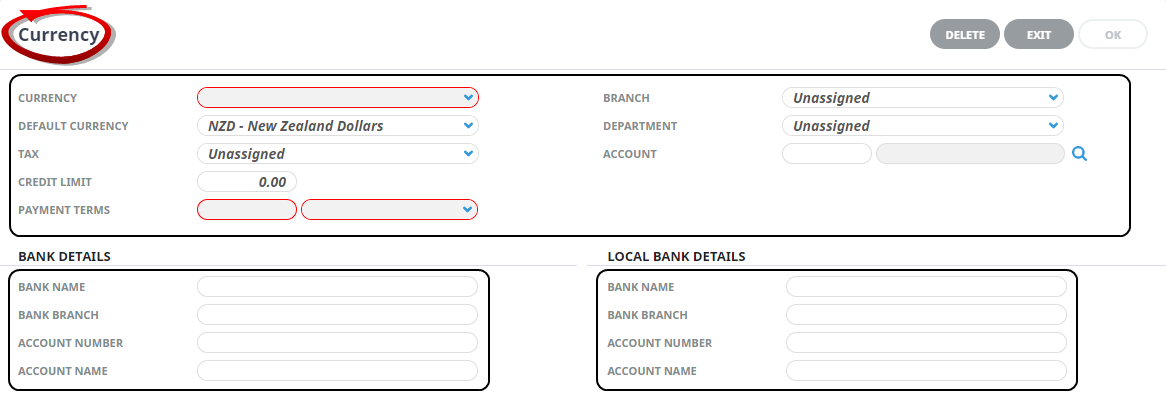
Currency
Select the Currency being added from the drop-down list.
Default Currency
The currency selected as the default currency will default into this field. If a different default currency is to be used, select it from the drop-down list.
Tax
Available taxes that have already been set up in Code Setup are available from the drop-down list. To attach a tax, highlight it.
Credit Limit
A credit limit can be entered against the currency in this field. There can be different credit limits for each currency attached to the agent. If the agent does not have a credit limit, leave the field as 0.00. If a credit limit is entered, the amount of credit remaining can be seen in the Balances screen of the Agent.
- Warn that the credit limit is exceeded.
- Deny entry of the transaction/booking if the credit limit is exceeded.
- Allow entry of the transaction/booking after a password has been entered.
Payment Terms
There are two fields which make up the payment terms for the agent. The first is a numeric value which is either a) a number of days or b) a date in a month depending on which setting is chosen from the drop-down list in the second field. Combined these are used to calculate the payment due date of an invoice transaction. The available options are:
| Option | Description |
|---|---|
| nn days | Prior to Travel |
| nn days | After Travel |
| nn days | After Invoice |
| Day | In Following Month |
| Day | In Current Month |
| Day | In Month of Travel |
| Day | In Month After Travel |
Branch / Department / Account
These three fields can be used to attach a GL revenue account that all revenue generated by the Agent/Debtor can be posted to. This is only encouraged where the Debtor is not a Booking Agent—i.e., a sundry Debtor and will never be invoiced for bookings.
Bank Name / Bank Branch / Account Number & Account Name
These fields can be used to store the Agent/Debtor bank account details. The Bank Name, Bank Branch and Bank Account fields can be output on agent messages. The Bank Name/Branch and Account Number can be up to 30 characters long with the Account Name being a maximum of 60 characters.
NOTE: There is no functionality in NX to automatically generate payments to agents. Payments can be made to agents by issuing a negative invoice offset by a negative receipt.
Local Bank Details
Bank / Branch / Account / Account Name
These fields can be used to store Local Debtor bank account details. The Local Bank, Bank Branch and Bank Account fields can be output on Agent messages.
Supporting Information
See also Currency Columns from within Debtors or Creditors in the appendix.